Tags
What are the tags for?
Tags are used to label Templates and Hierarchies, to filter and sort them by a set of Tags.
How do I create, edit, and delete a tag?
There are several ways to create a Tag. To use the first one go to the Manage Tags page. Click the Templates button placed in the main menu and select the Manage Tags in the TAGS section.
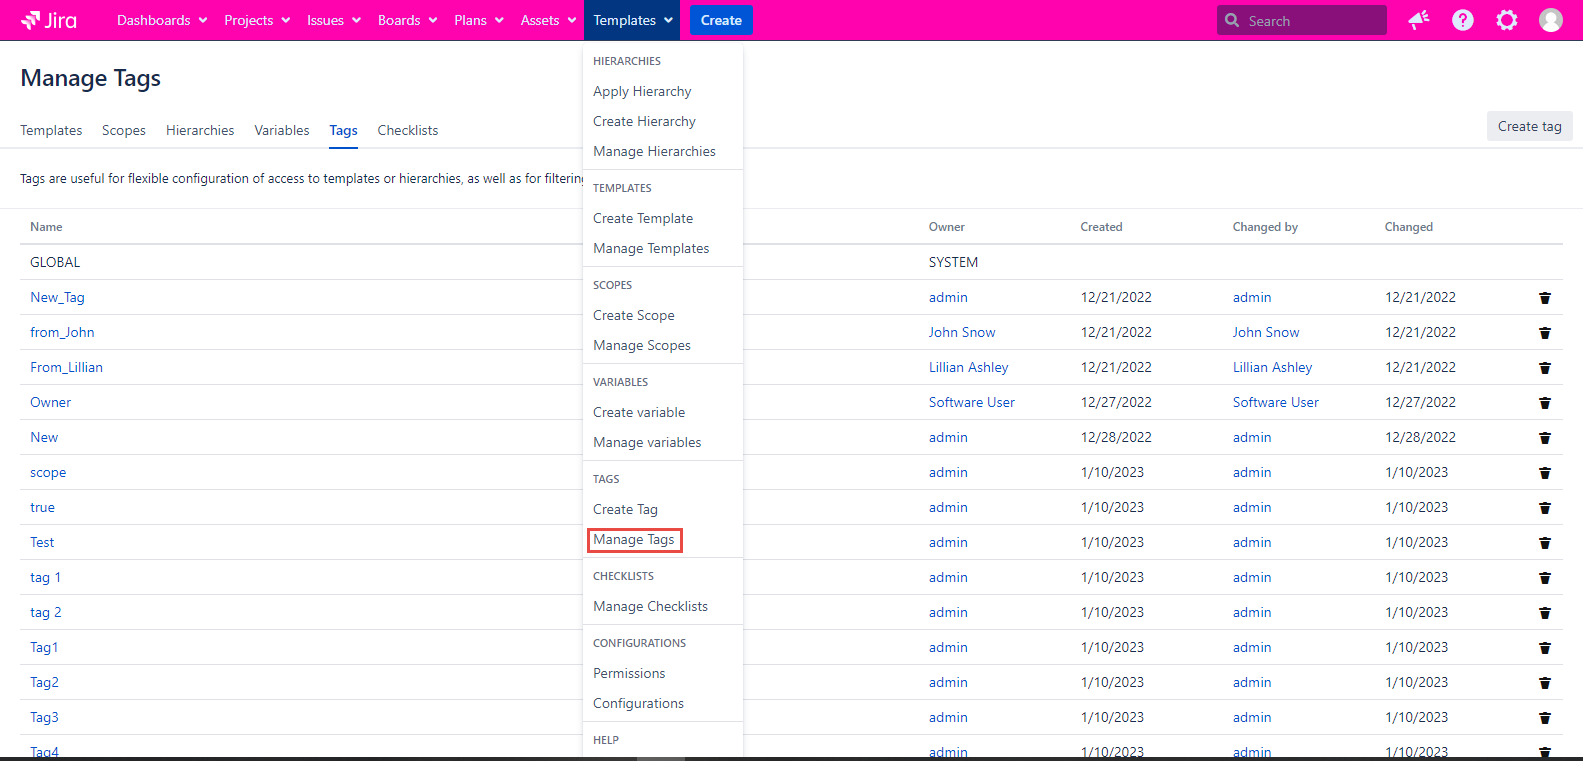
All Tags will be displayed on this page. The GLOBAL tag already exists on this page. By default, this tag is assigned to all new templates and hierarchies.
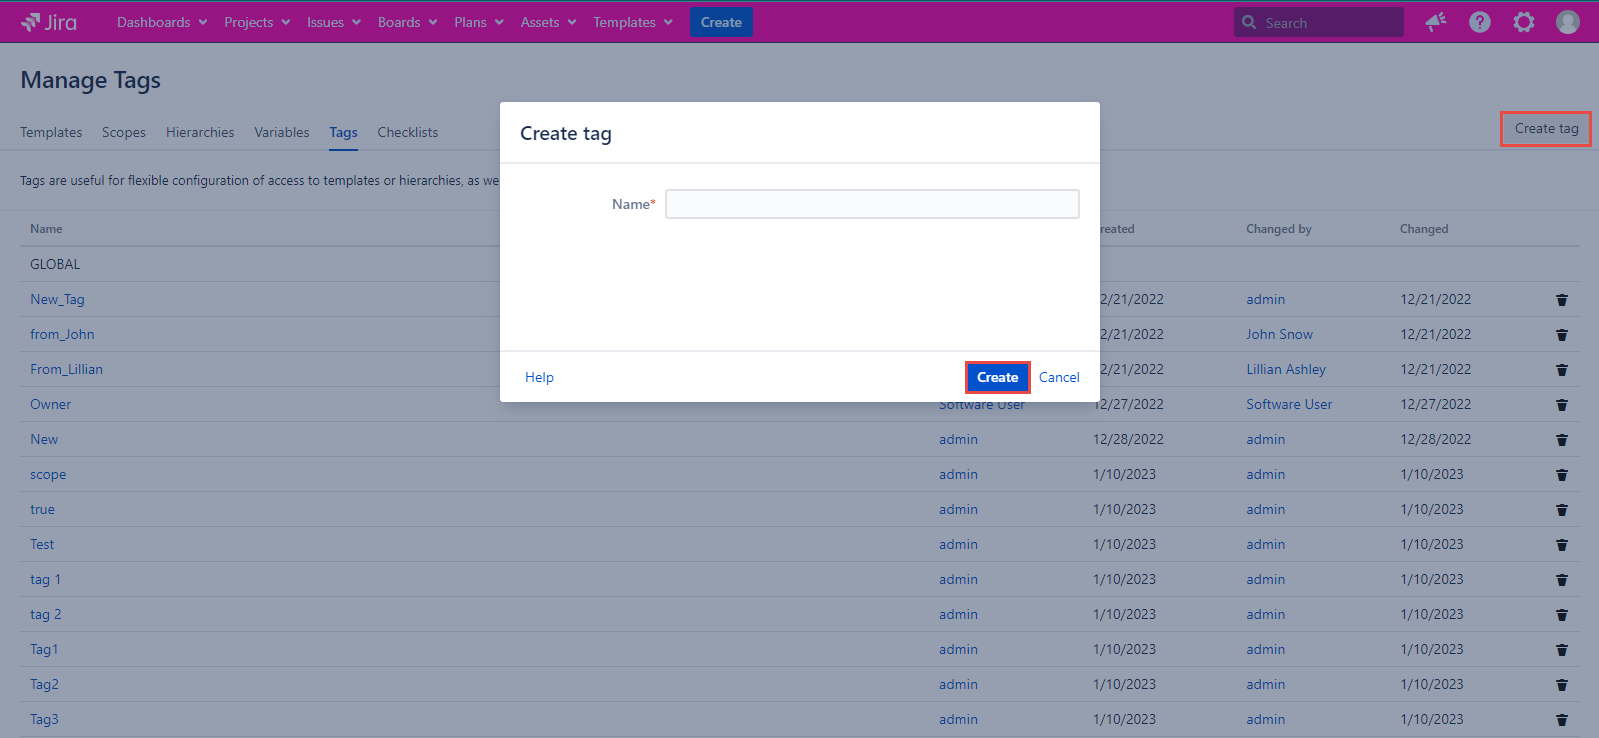
Let's create a new tag using the Create tag button on the Manage Tags page:
Click the Create tag button placed in the upper right Manage Tags page corner.
Enter the value into the required Name field on the Create tag dialog
Click the Create button placed at the footer of the Create tag dialog.
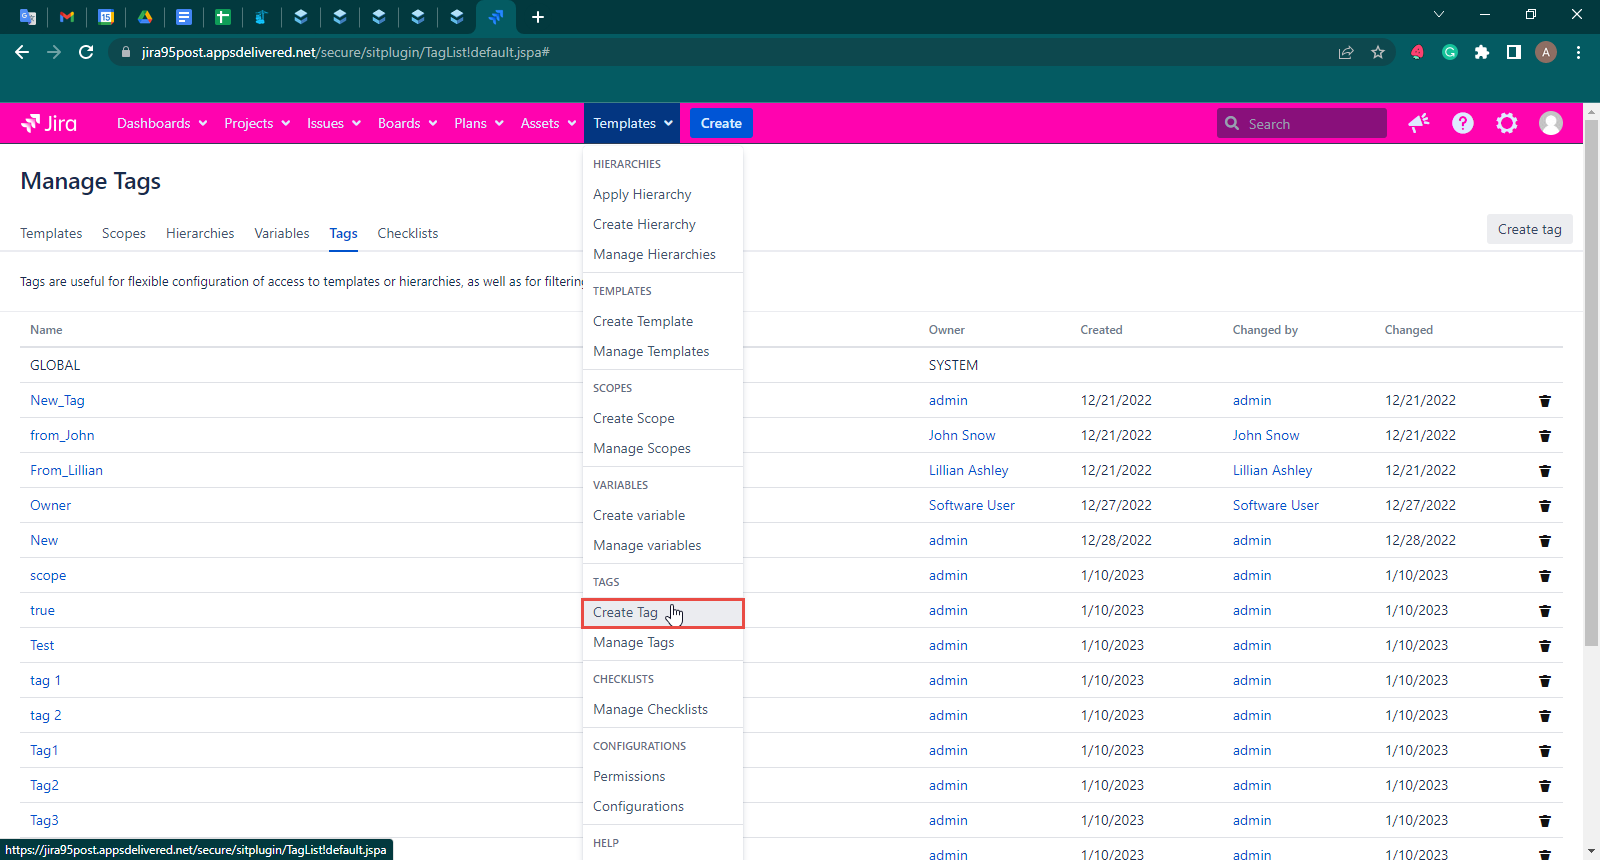
The second way to create a Tag is to select the Create Tag option in the Templates dropdown and follow the steps described above.
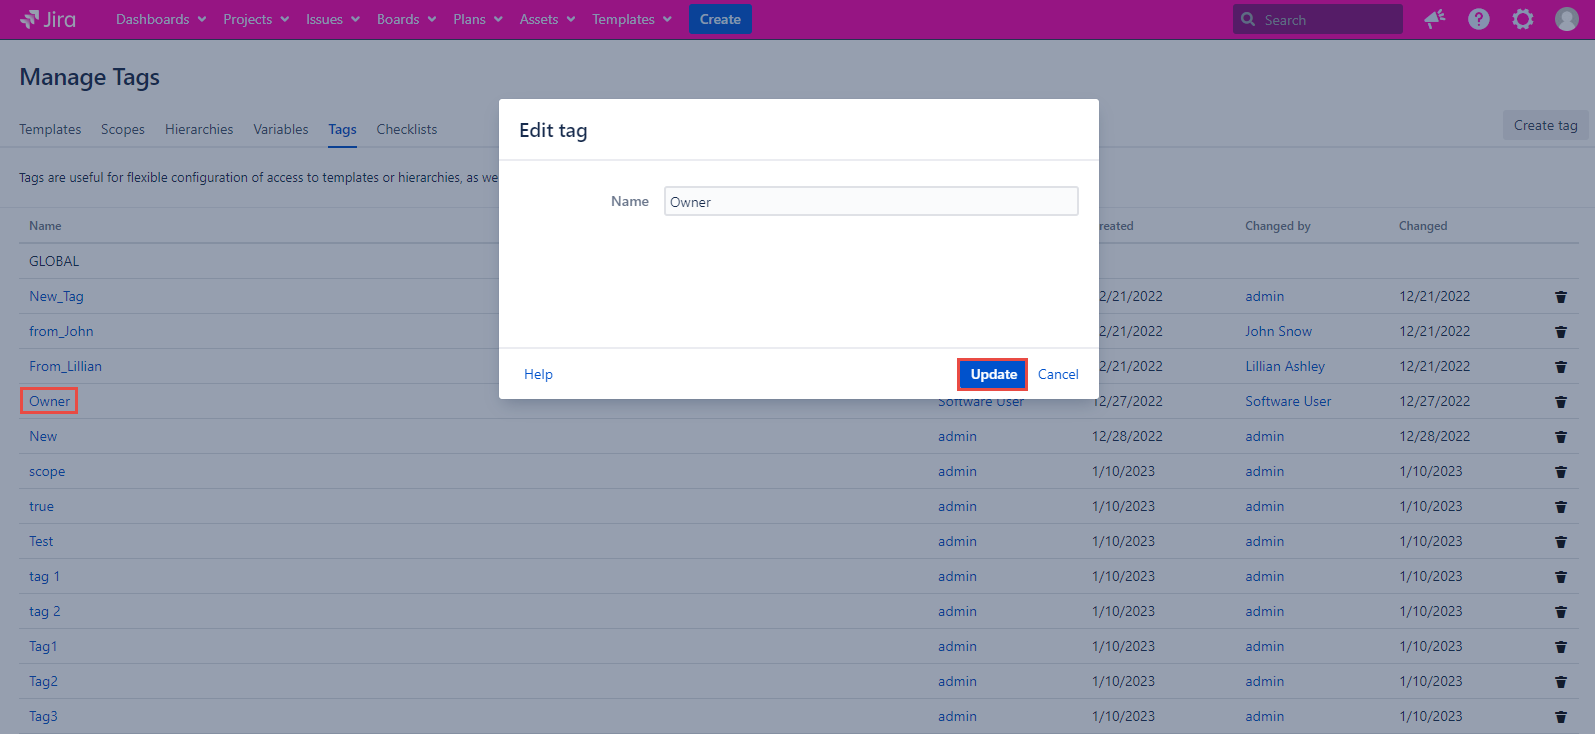
A Tag can be edited by clicking its name on the Manage Tags page. Then edit the value in the Name field and click the Update button.
To delete a Tag you have to go the the Manage Tags page, click the trash bin icon placed in the specific Tag row, and click the Delete button placed on the Delete Tag dialog.
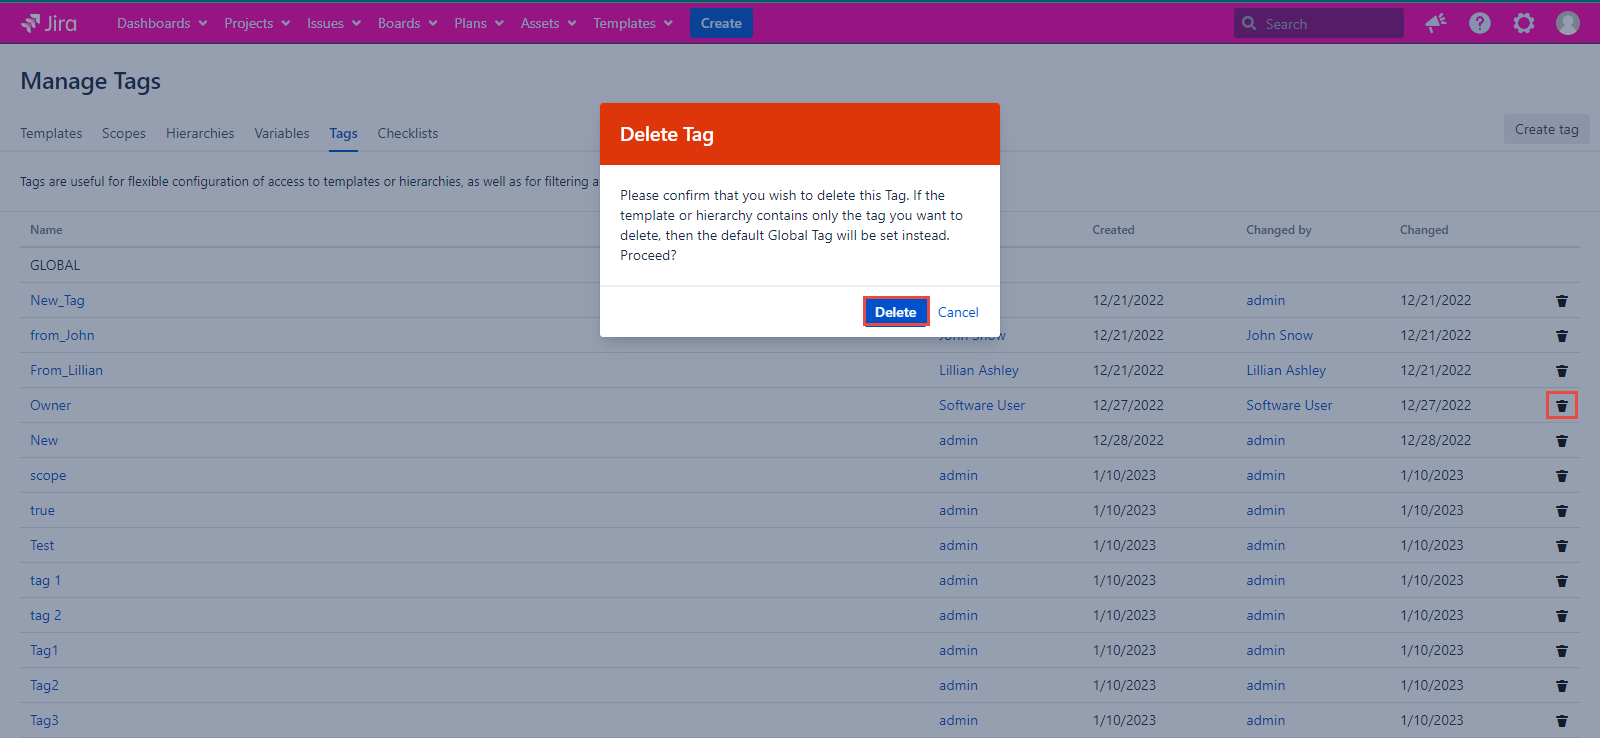
If the template or hierarchy contains only the tag you want to delete, then the default GLOBAL Tag will be set instead.
How to assign a tag to a template?
In order to assign a Tag to a Template, let’s go to the Manage Templates page and click the Create Template button.
One more way to create a Tag is available in the Create Template and Create Hierarchy dialogs.
Let's fill in the required fields for the template: Template name and Scope. You can find the documentation on creating templates here. Let's see how to fill in the Tag field.
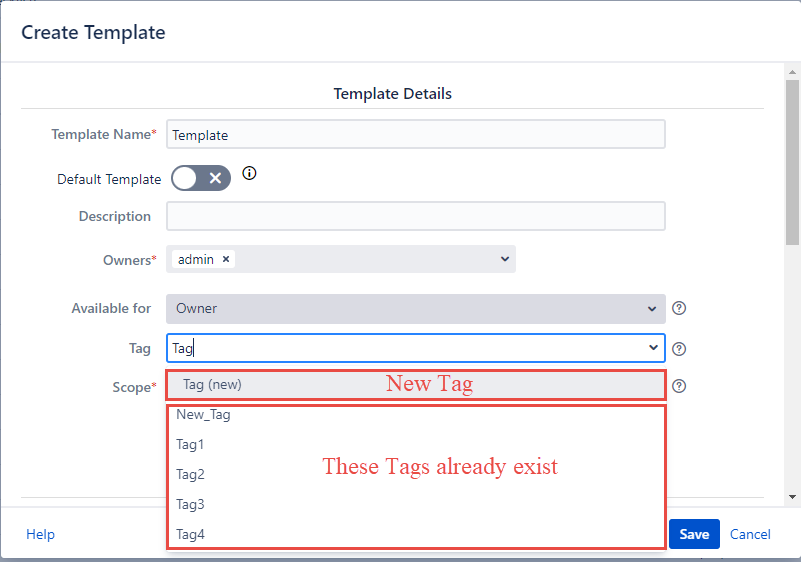
You have to enter at least three characters and the app will offer you all tags that contain such a set of characters in their names. You can select the Tag marked with the (new) marker. After creating a template, this new Tag will appear in the system. You can also select an existing Tag from the list.
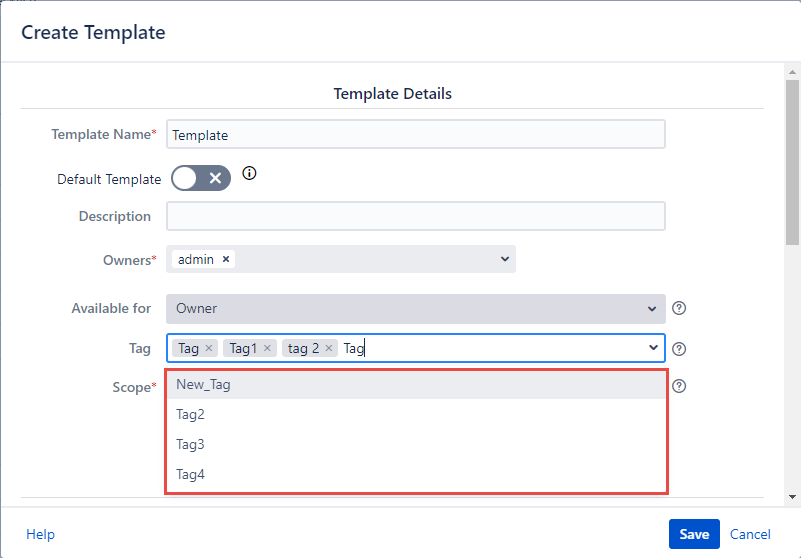
If you do not select any Tags when creating a template, then the GLOBAL Tag will be set by default.
Searching for Tags by name is case sensitive.
How to assign a tag to a hierarchy?
In order to assign a Tag to a Hierarchy, first, we need to go to the Create Hierarchy or Edit Hierarchy page. Once there, enter the desired Tags into the corresponding field. You can find the documentation on creating hierarchies here.
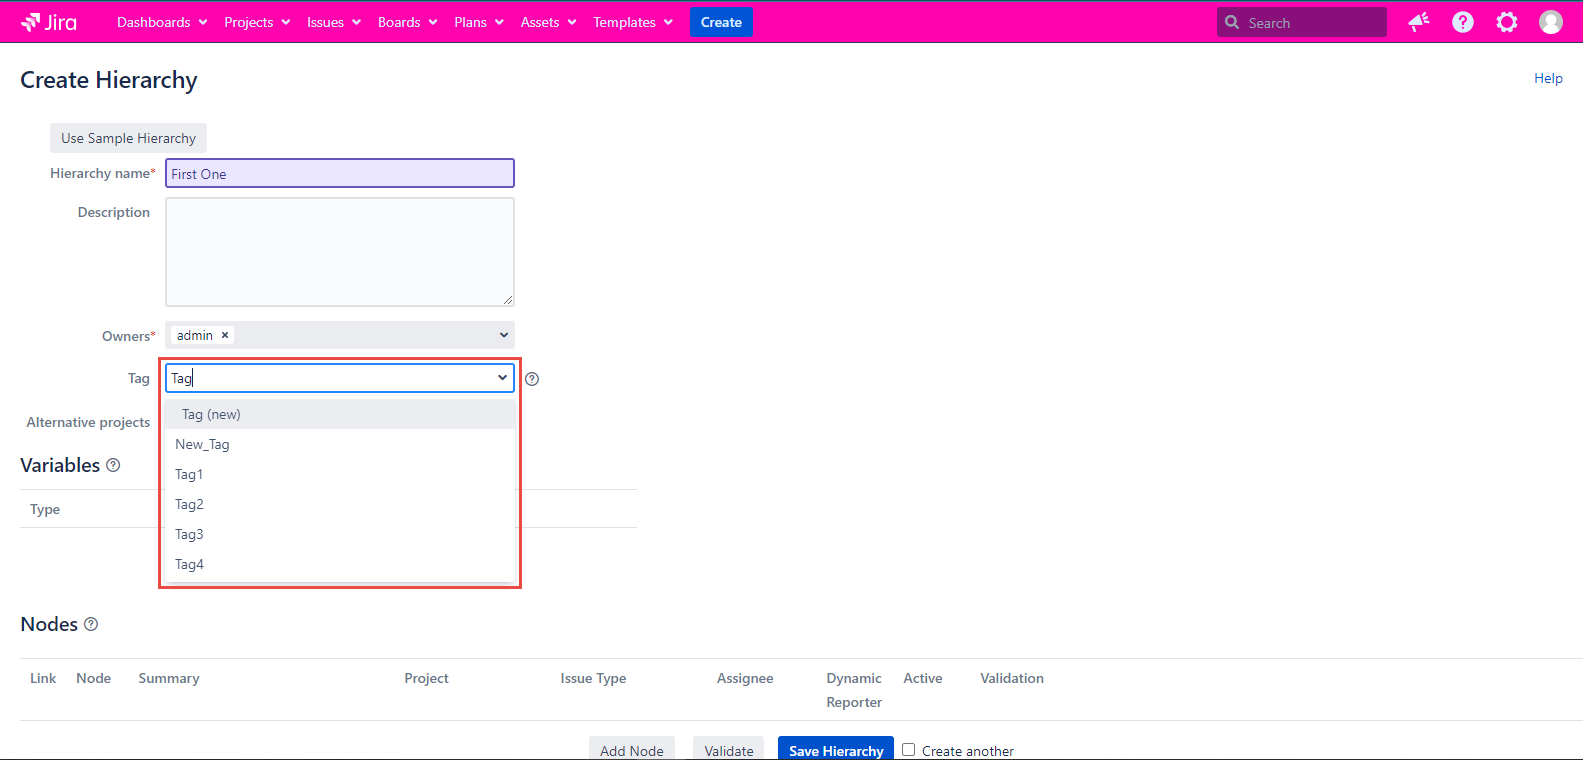
You have to enter at least three characters and the plugin will offer you all tags that contain such a set of characters in their names. You can select the Tag marked with the (new) marker placed below the Tag field and your new tag is created. After creating a hierarchy, this new Tag will appear in the system. You can also select an existing Tag from the list.
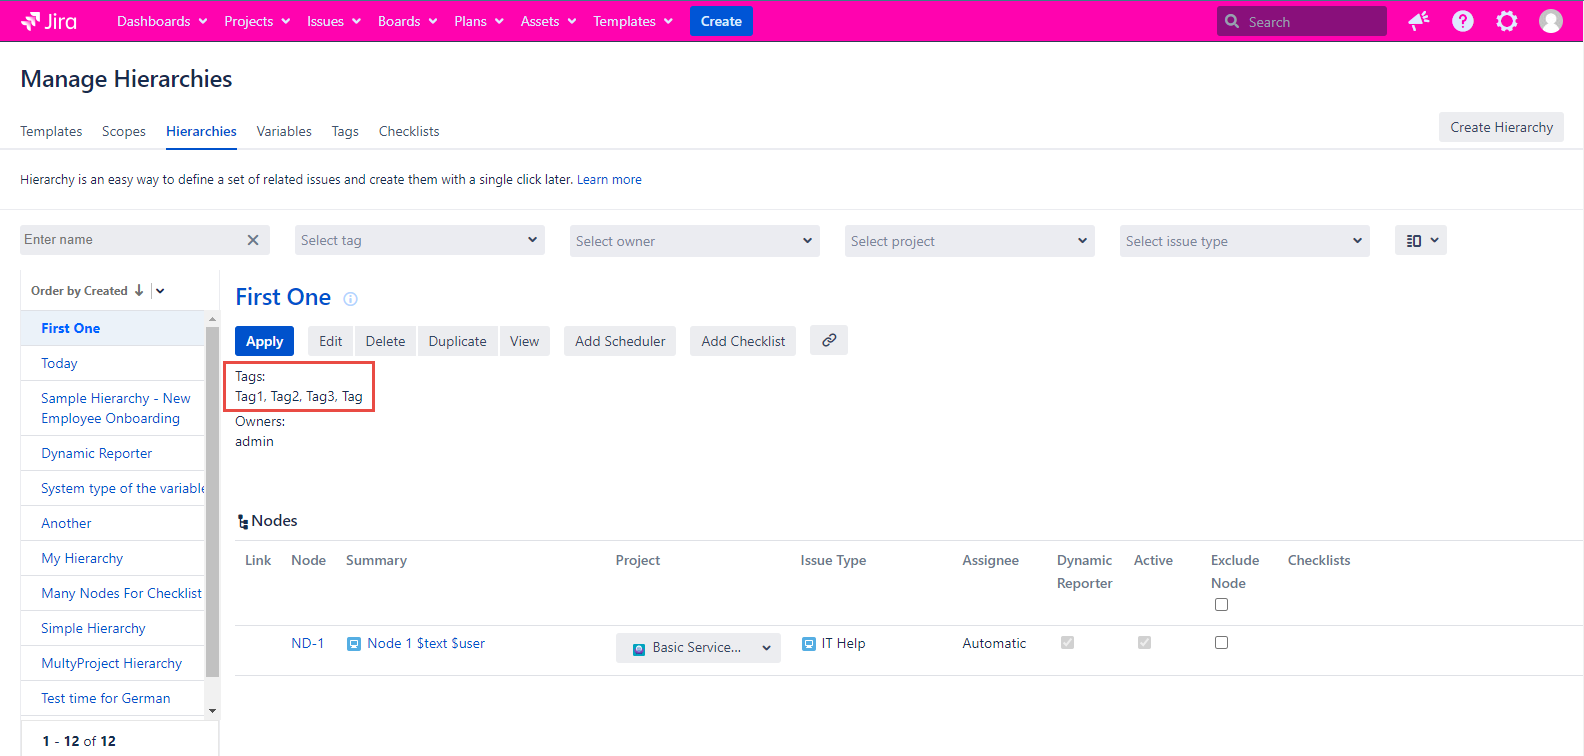
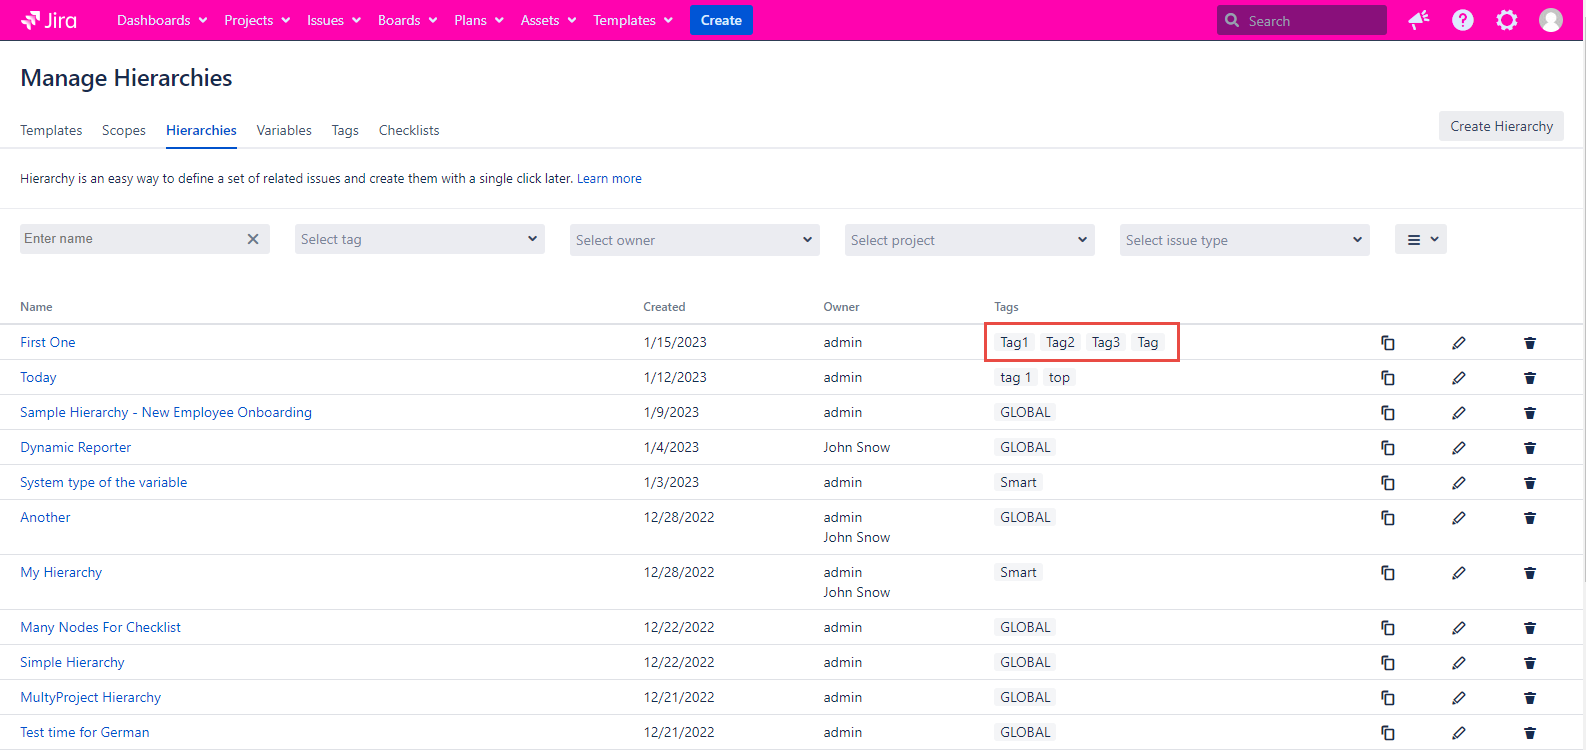
The Tags are displayed on the Manage Hierarchies page with Detailed and List views.
How to remove the tag from the Template or Hierarchy?
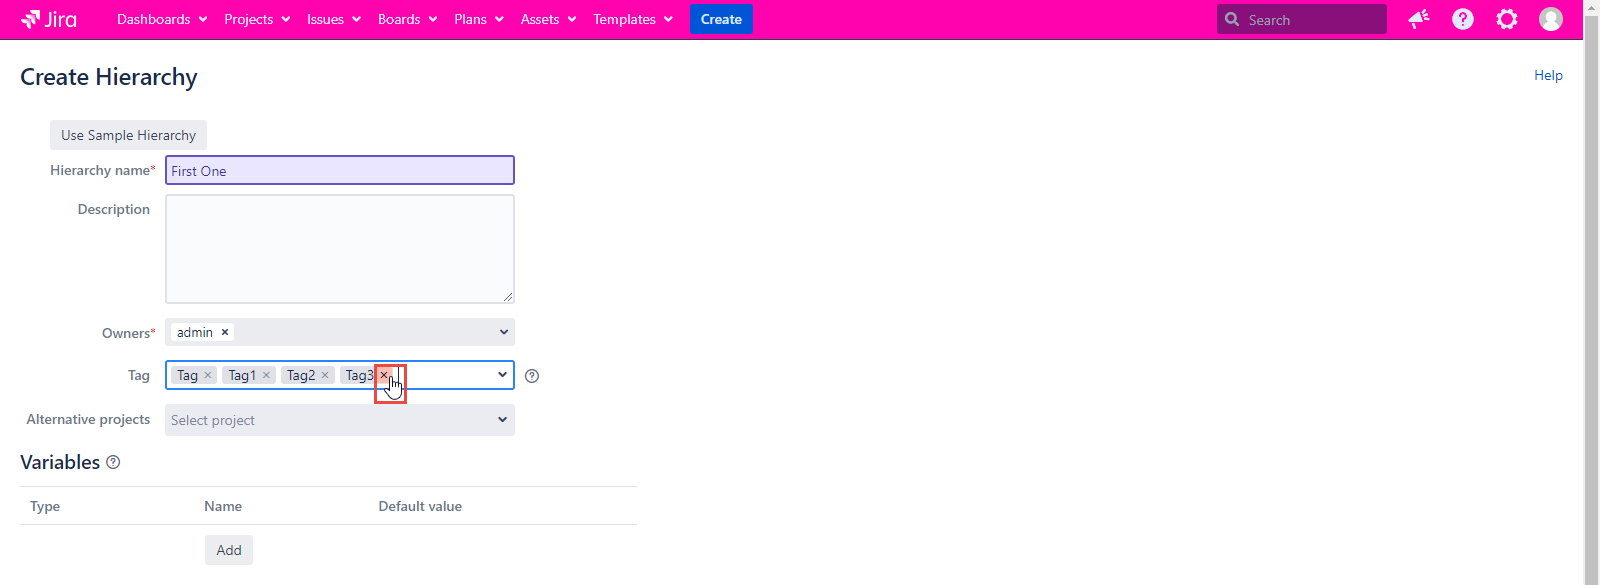
Any Tag can be removed from the template by clicking on the cross icon of this Tag. This operation can be done both when creating a template and when editing it.
How to filter templates and hierarchies using tags
Let's get started on the Manage Templates page. The screenshot below shows a Tag filter and a column with Tag values.

Enter the name of the tag you want in the Select tag filter field. As a result, only templates containing this tag will be displayed on the page.
If we select several tags at the same time, then the page will display templates that contain at least one of these tags:

You can read more about Filtering Templates on the Filtering and sorting Templates | Templates-Filters
Filtering Hierarchies is done in a similar way.
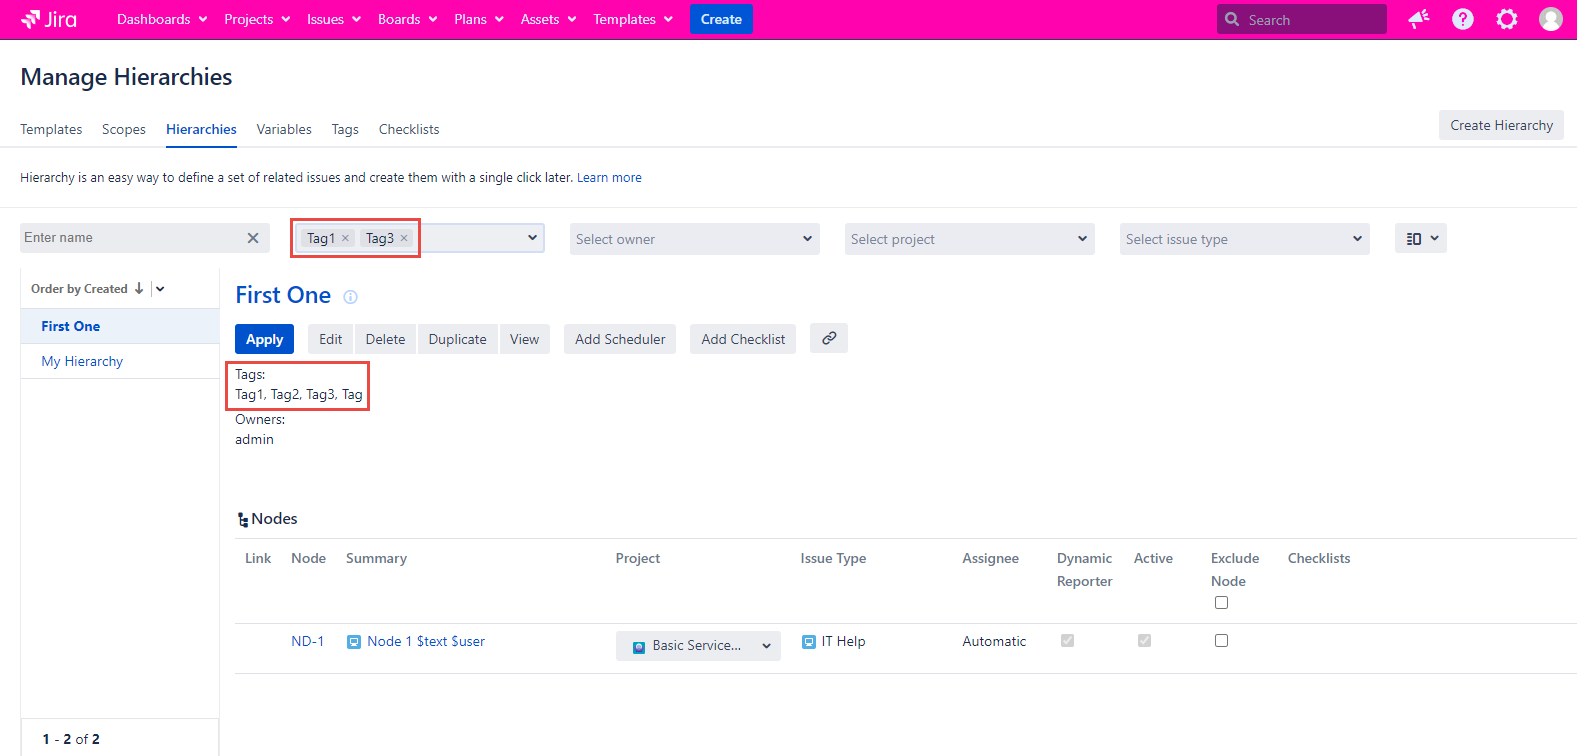
You can read more about Filtering Hierarchies on the Filtering and Sorting of Hierarchies | Filtering-Hierarchies
For any questions or feature requests contact us via the Customer Portal
Or drop us an email at support@appsdelivered.atlassian.net. If you are using this option, please check your junk folder regularly, as our reply can be placed there by your email service.
Before submitting a bug report or support ticket, please update to the latest version of the add-on.
Please add information about the version of Jira and the add-on.
.png)