.png)
Manage Spaces
Spaces Overview
Spaces act as containers that allow users to manage various item types in a structured and centralized way. Within each Space, you can apply and edit the following:
Hierarchies
Issue Templates
Link Templates
Subtask Templates
This setup provides greater flexibility and control over how these items are organized and used across your workflows.
Tags Functionality Migration to Spaces
We’ve moved the Tags functionality to Spaces.
Each Tag will be automatically converted into a Space.
No action is required from your end during this automated migration process.
🔄 Manual Backup Option:
If the automatic conversion does not occur, you can manually convert Tags by:
Navigating to the Spaces page.
Clicking the "Convert Tags" button
See also
Create Space
Users can create new Spaces to store Different types of templates and hierarchies.
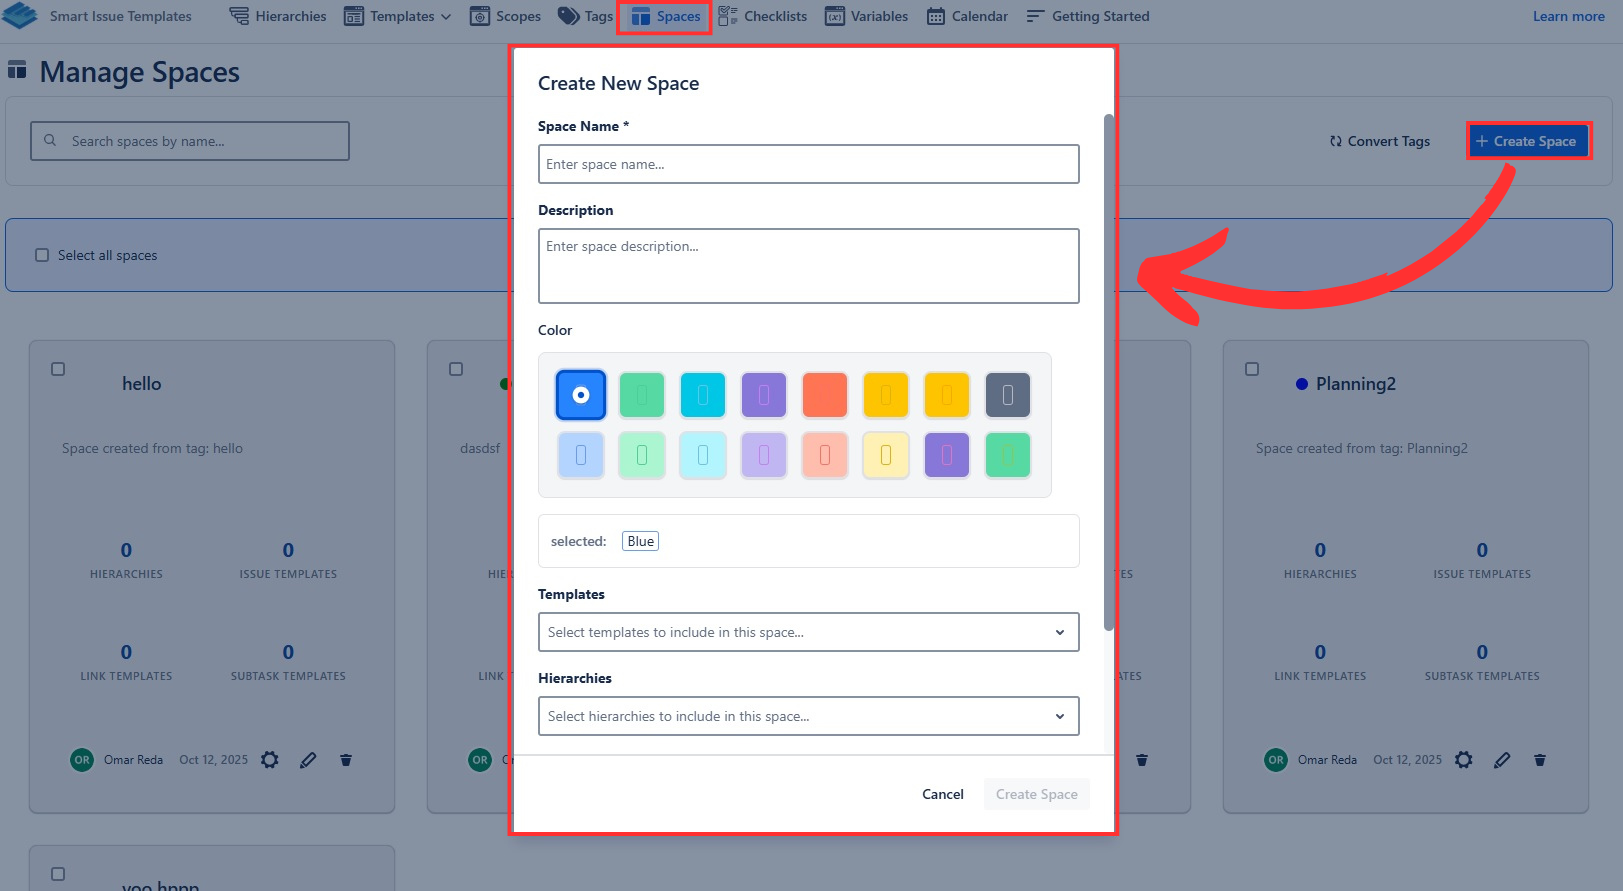
Steps to Create a Space
Open the Manage Spaces page
Click the ‘Create Space’ button
Enter Space Details:
Space Name: Provide a meaningful name (e.g., "Documentation & Knowledge Base References").
Space Description (Optional): Add a brief description for the space.
Color (Optional): Add a unique color for the space
Add the desired templates and hierarchies ( Multi selection is available in each type ) .
Click "Create" to create the Space.
Now the Space has been created and can be used
Edit Space
You can update an existing Space to modify its details, such as the name, description, or update its items.
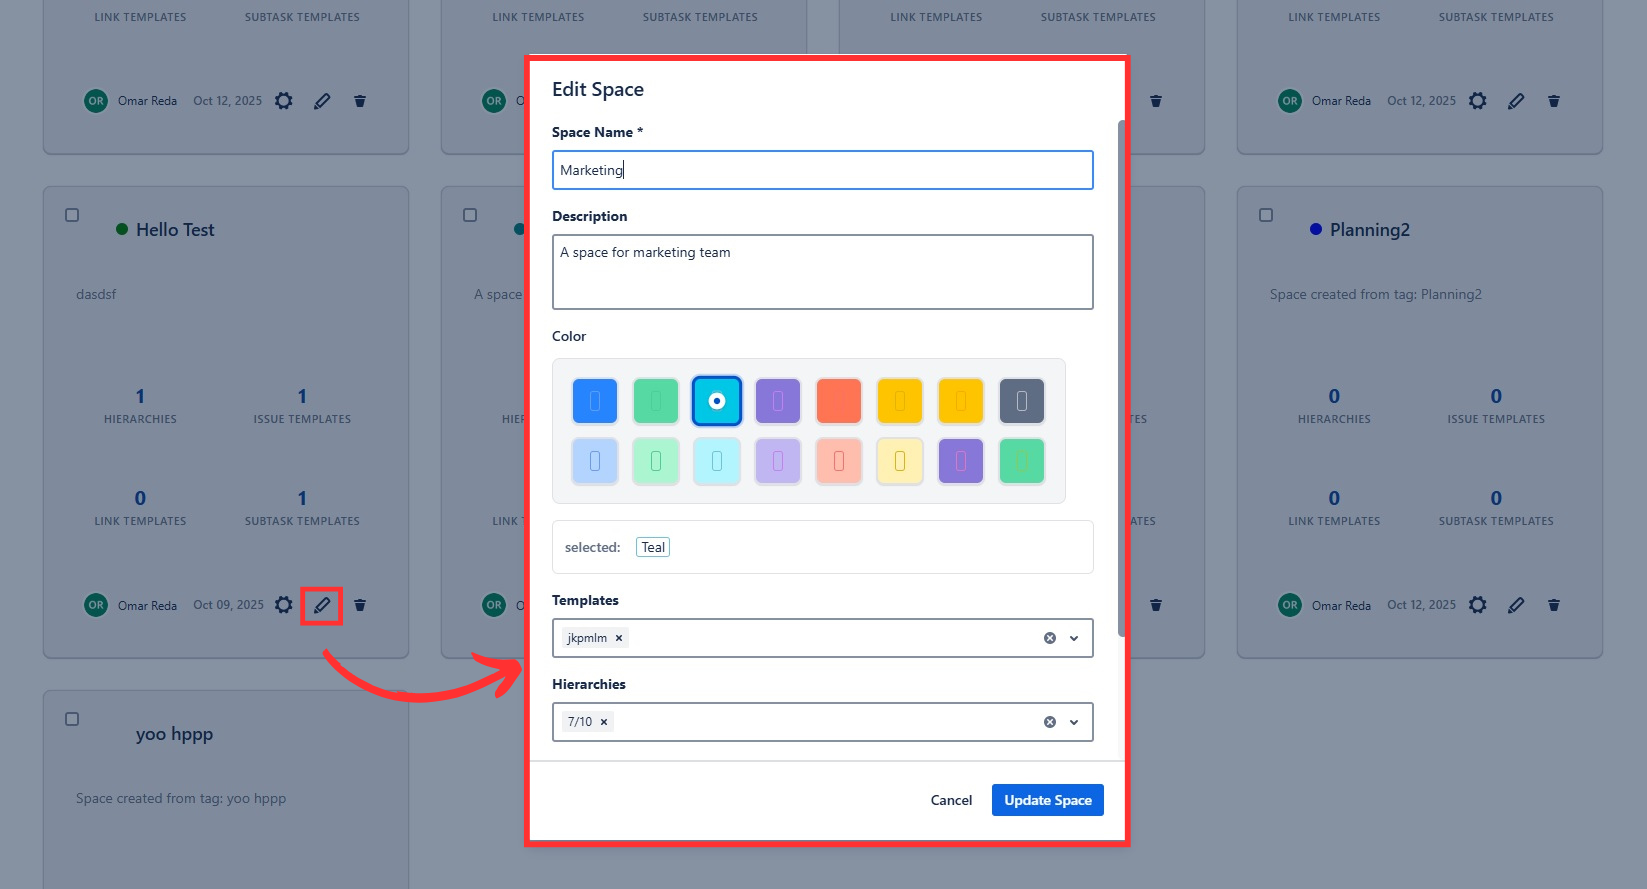
Steps to Edit a Space
Open the Manage Spaces Page
Navigate to Spaces from the top Navbar.
Select the Space to Edit
Locate the space you want to update from the list.
Click on the Edit (pencil) icon next on the space’s card.
Modify space Details
Update the space Name or its items as needed.
Save Changes
Click Update Space to apply your modifications.
Delete Space
To delete a single Space:
Find the space in the Spaces list.
Click the Trash Bin Icon on the space’s card.
Confirm Deletion:
A confirmation dialog will appear.
Click "Delete" to delete the space permanently.
.png?inst-v=f6276b53-5a4b-4223-9678-95672852a6d3)
To bulk delete spaces:
Check the checkboxes of the Spaces you want to delete.
Click on the Delete button at the top of the page.
Confirm Deletion:
A confirmation dialog will appear.
Click "Delete" to delete the spaces permanently.
.png?inst-v=f6276b53-5a4b-4223-9678-95672852a6d3)
Note: Once a Space is permanently deleted, it cannot be restored. Be sure to double-check before confirming the deletion.