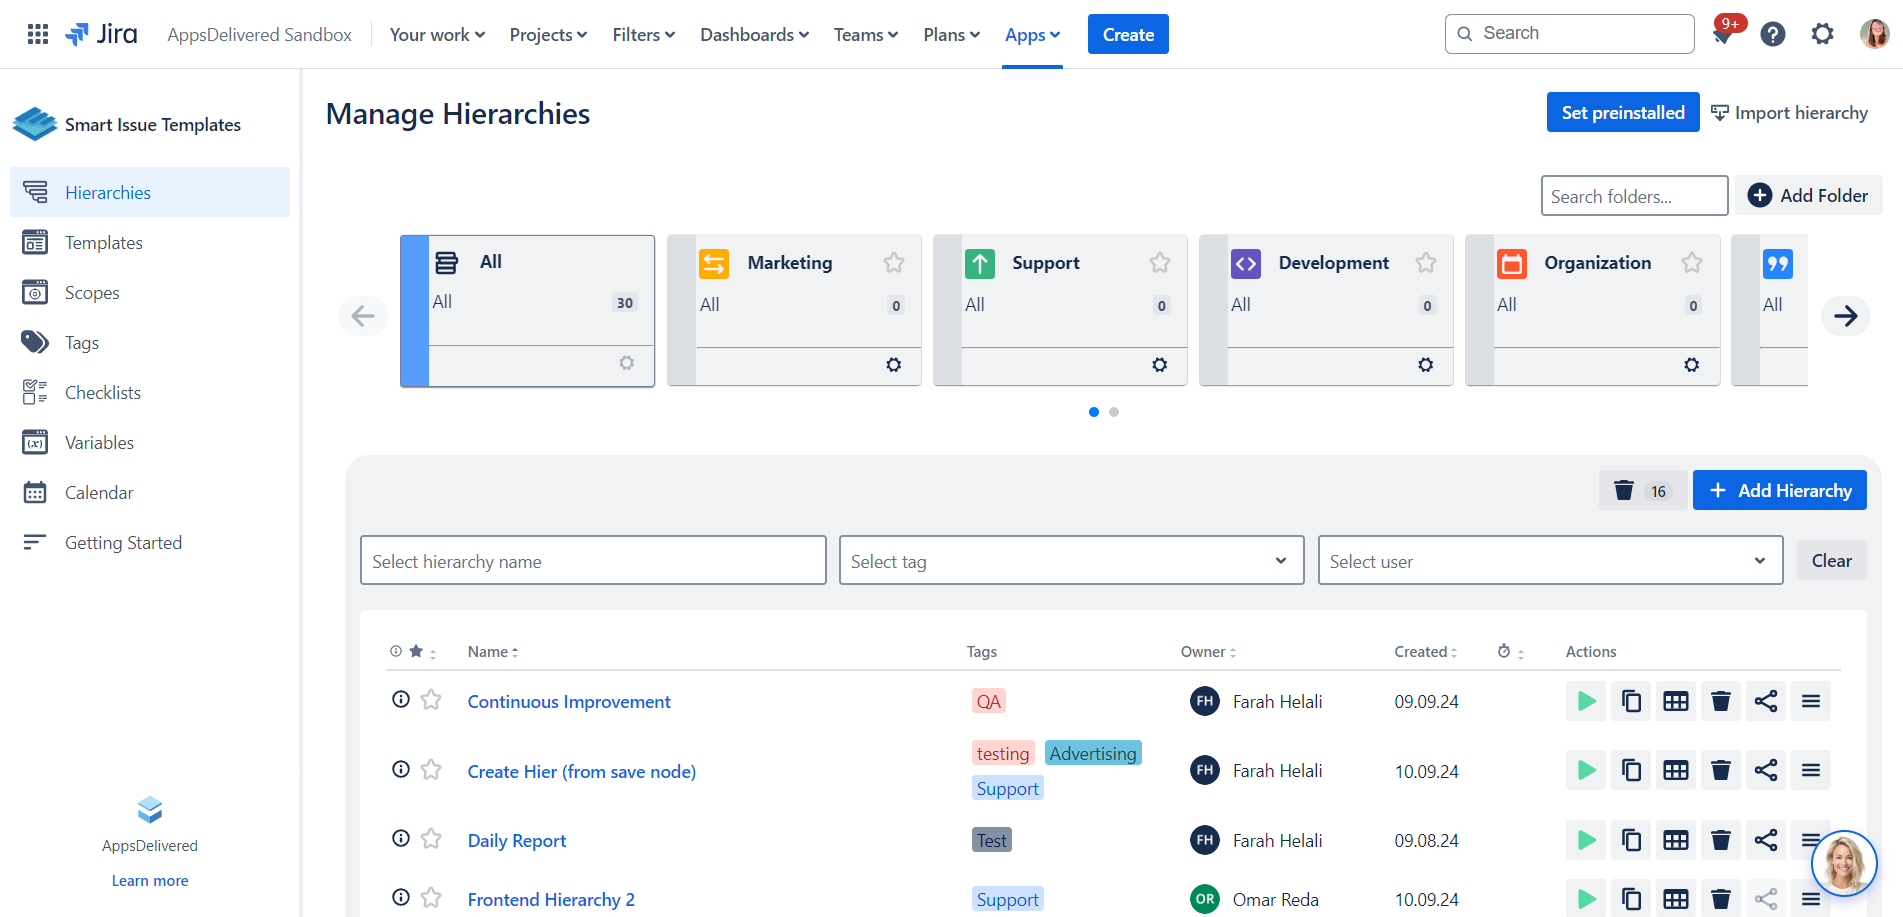
Manage Hierarchy
In this guide, we’ll walk you through how to set up and effectively manage your hierarchies.
The 'Manage Hierarchies' section serves as your hub for organizing and administering the hierarchies you've created. Accessible through the 'Apps' menu, this section offers a comprehensive suite of tools to modify, view, and manage hierarchies according to your permissions.

Accessing Manage Hierarchies
To navigate to the "Manage Hierarchies" page:
Go to the 'Apps' section.
Select 'Manage Hierarchies'.
Click on the 'Hierarchies' button in the left navigation panel.
Here, you can perform actions like creating, applying, duplicating, and deleting hierarchies, among others.
Key Actions
Creating and Applying Hierarchies
Create a Hierarchy: Initiate the creation of a new hierarchy by selecting the 'Create Hierarchy' option. Provide the necessary details and configurations for your hierarchy.
.png?inst-v=ef1521b6-b9dc-4003-924e-c0667ac0d3dd)
Apply a Hierarchy: Utilize the 'Apply' button to initiate the selected hierarchy's application process, including a confirmation step.
.png?inst-v=ef1521b6-b9dc-4003-924e-c0667ac0d3dd)
How to Create Hierarchy: Version 20.6.0 Сreate Hierarchy
How to Apply Hierarchy: Version 20.6.0 Apply Hierarchy
Managing Hierarchy Schedulers
View Schedulers: Hover over the clock icon next to a hierarchy to see available schedulers.
.png?inst-v=ef1521b6-b9dc-4003-924e-c0667ac0d3dd)
How to manage Scheduler: Version 20.6.0 Apply Hierarchy by Scheduler
Duplicating and Deleting Hierarchies
Duplicate a Hierarchy: Use the 'Duplicate' button to create a copy of a hierarchy.
.png?inst-v=ef1521b6-b9dc-4003-924e-c0667ac0d3dd)
Delete a Hierarchy: Remove a hierarchy by selecting it and clicking the 'Delete' option. Deleted hierarchies move to the 'Trash' folder for 30 days before permanent deletion.
.png?inst-v=ef1521b6-b9dc-4003-924e-c0667ac0d3dd)
Sharing Hierarchies Permissions
Copy Hierarchy Link and Share Permissions for the selected Hierarchy: Share a hierarchy by copying its link to your clipboard and share permissions with either user for the Hierarchy.
.png?inst-v=ef1521b6-b9dc-4003-924e-c0667ac0d3dd)
How to manage sharing Permissions for Hierarchy: Share Hierarchies Permission
Organizing with Hierarchy Folders
Hierarchy Folders - a feature for better organization.
.png?inst-v=ef1521b6-b9dc-4003-924e-c0667ac0d3dd)
Creating and Managing Folders
Create a Folder: Click 'Add a Folder', choose a name and icon, and create your folder.
.png?inst-v=ef1521b6-b9dc-4003-924e-c0667ac0d3dd)
Edit or Delete a Folder: Modify folder details or remove a folder without affecting the hierarchies it contains.
.png?inst-v=ef1521b6-b9dc-4003-924e-c0667ac0d3dd)
Folder Operations
Add/Remove a Hierarchy to/from a Folder: Adjust folder associations for your hierarchies as needed.
.png?inst-v=ef1521b6-b9dc-4003-924e-c0667ac0d3dd)
Folder Permissions
You can also manage the visibility of hierarchies by configuring the permissions for hierarchy folders. This allows you to control who can view, update, delete, and manage hierarchies within specific folders.
Steps to Edit Folder Permissions:
Open the Manage Hierarchies section.
Select the folder for which you want to modify permissions.
Click the Permissions option for the folder.
.png?inst-v=ef1521b6-b9dc-4003-924e-c0667ac0d3dd)
In the permissions panel, you can:
Select specific users or groups from the dropdown to assign permissions.
Grant permissions such as View All, Update Folder, Delete Folder, and Add/Remove Hierarchy by enabling the corresponding checkboxes.
.png?inst-v=ef1521b6-b9dc-4003-924e-c0667ac0d3dd)
Making a Folder Private:
You can make the folder private by enabling the Make private toggle at the bottom of the permissions panel. When this is enabled, only users or groups with explicit permissions will be able to access the folder.
.png?inst-v=ef1521b6-b9dc-4003-924e-c0667ac0d3dd)
Once done, click Save to apply the changes.
When a folder is set to private, it will be displayed with a lock icon in the Manage Hierarchies section, as shown in the image. This indicates that only users or groups with specific permissions can view and interact with the folder and its contents. Other users who do not have access will not be able to see or edit the hierarchies within the folder.
.png?inst-v=ef1521b6-b9dc-4003-924e-c0667ac0d3dd)
History and Records
Hierarchy Apply History: Track the application of hierarchies and the progress of associated Jira issues through the 'Apply History' tab. This includes detailed records of each time when the Hierarchy was applied, searchable by date range.
.png?inst-v=ef1521b6-b9dc-4003-924e-c0667ac0d3dd)
.png)