.png)
Default Template
Starting with the 1.12.3 Smart Issue Template version the ability to set the Template by default is added.
The Default Template function makes the Template applied immediately if a unique combination of Jira project and issue type is selected and the Default Template is created based on this specific combination by the customer:
To start using all advantages of this feature simply click the Disable Default Templates checkbox on the Configurations page:
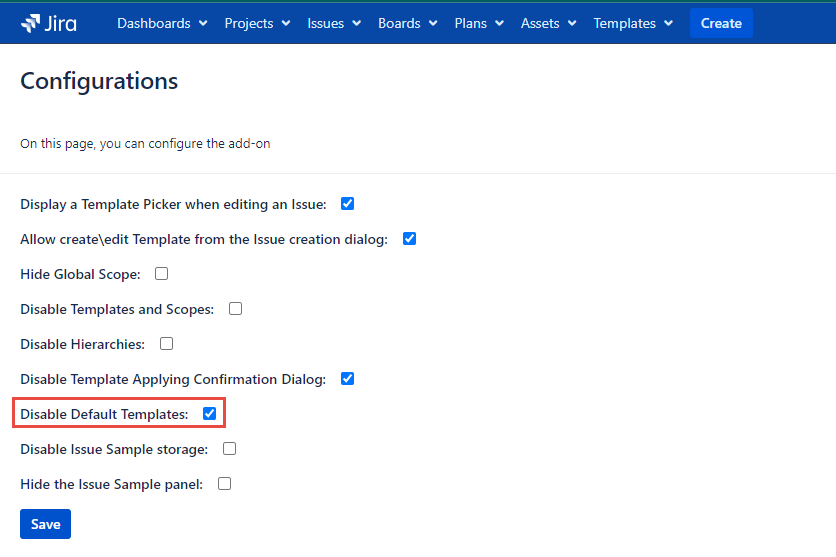
Click the Templates button in the main menu
Select the Configurations item in the dropdown
Click the Disable Default Templates checkbox to deactivate it
Click the Save button
How to make a Template Default?
To make the Template default, select the combination of Jira project and issue type and enable the Default Template toggler button in the Create Template or Edit Template dialogs.
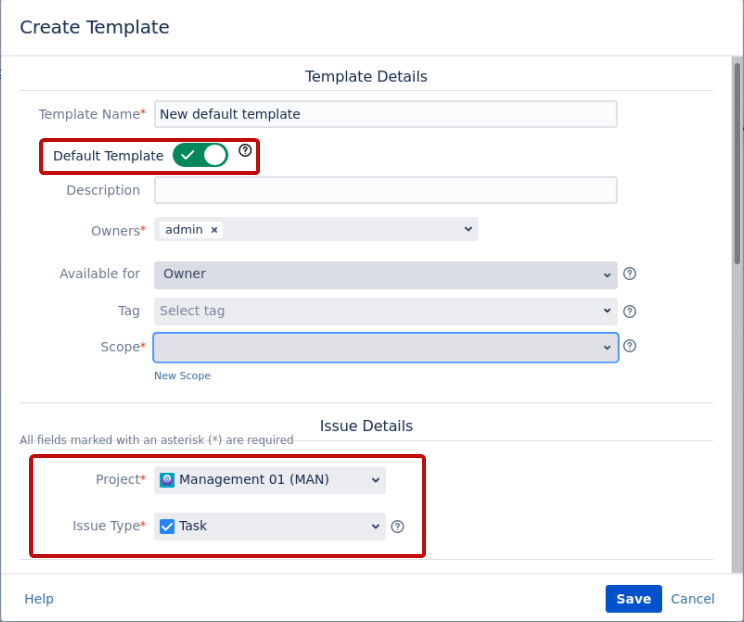
Once, the Default Template is set it will be the default for all users in the Jira instance (unless it is not restricted by scope). So we recommend admins to set Templates as default for all users.
There is an ability to create only one unique Default Template for the same Jira project and the same issue type combination. If you will try to create another one you will get the following notification:

In this case, change the selected project and/or issue type or disable the Default Template toggler button. The non-default Templates can still be selected in the Select Template list if they are available by scope:
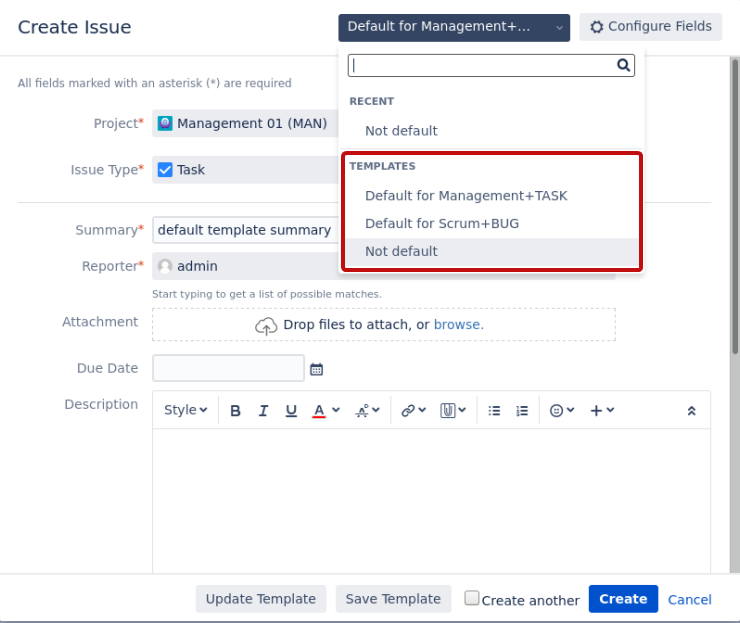
Other Default Templates can be selected in the Template Picker dropdown for another project and issue type combinations if they are available by scope.
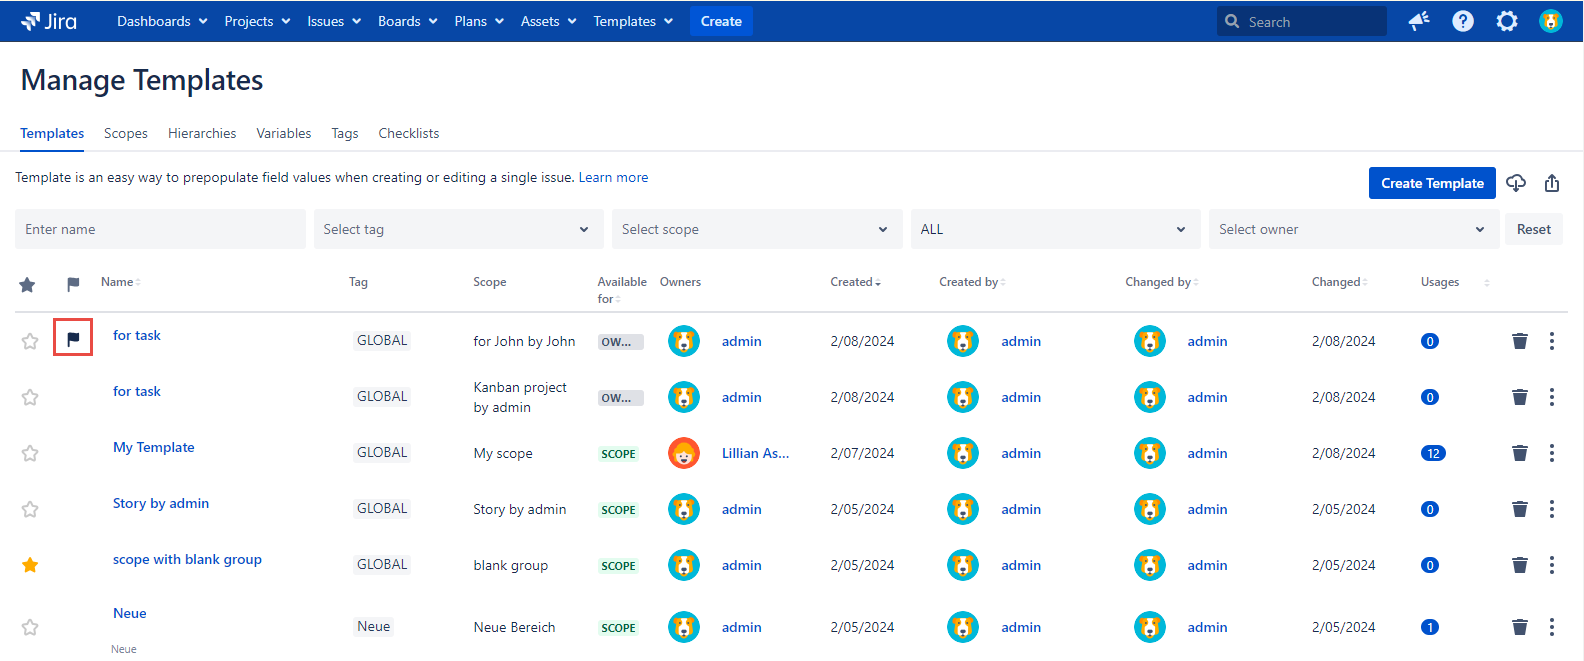
How can I determine the Default Template among other Templates on the Manage Templates page?
Since the 3.0 Smart Issue Templates version the Default Templates are marked by the flag on the Manage Templates page.
How to edit the Default Template?
To be able to edit the Default Template you are to be granted the Edit Template permission on the Smart Issue Templates Permissions page.
The Default Template differs from the standard Templates and the way to edit it is limited by the Edit Template dialog opened from the Manage Templates page only as the Default Template toggle is placed on this specific Edit Template dialog.
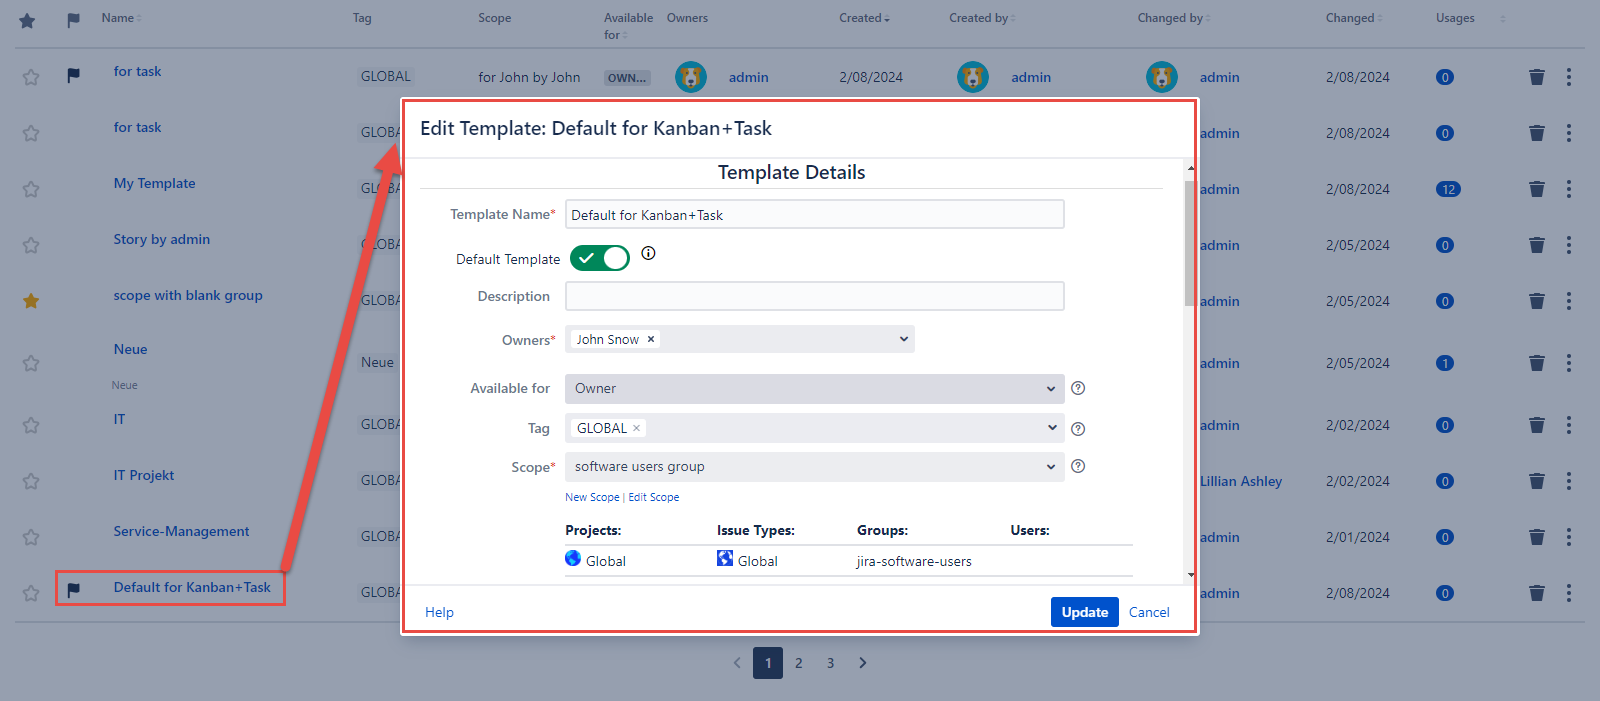
The Default Template toggle is available on the Edit Template dialog opened only from the Manage Templates page. Other Edit Template dialogs are not suitable for this purpose.
Open the Manage Templates page.
Click the specific Template name link there.
Make the needed changes.
Activate the Default Template toggle as after the changes it is turned off automatically by default.
Click the Update button at the footer of the Edit Template dialog.
How to copy the Default Template?
The Default Template can be copied but the Default Template toggle will be turned off automatically.
Follow the link for the detailed steps.
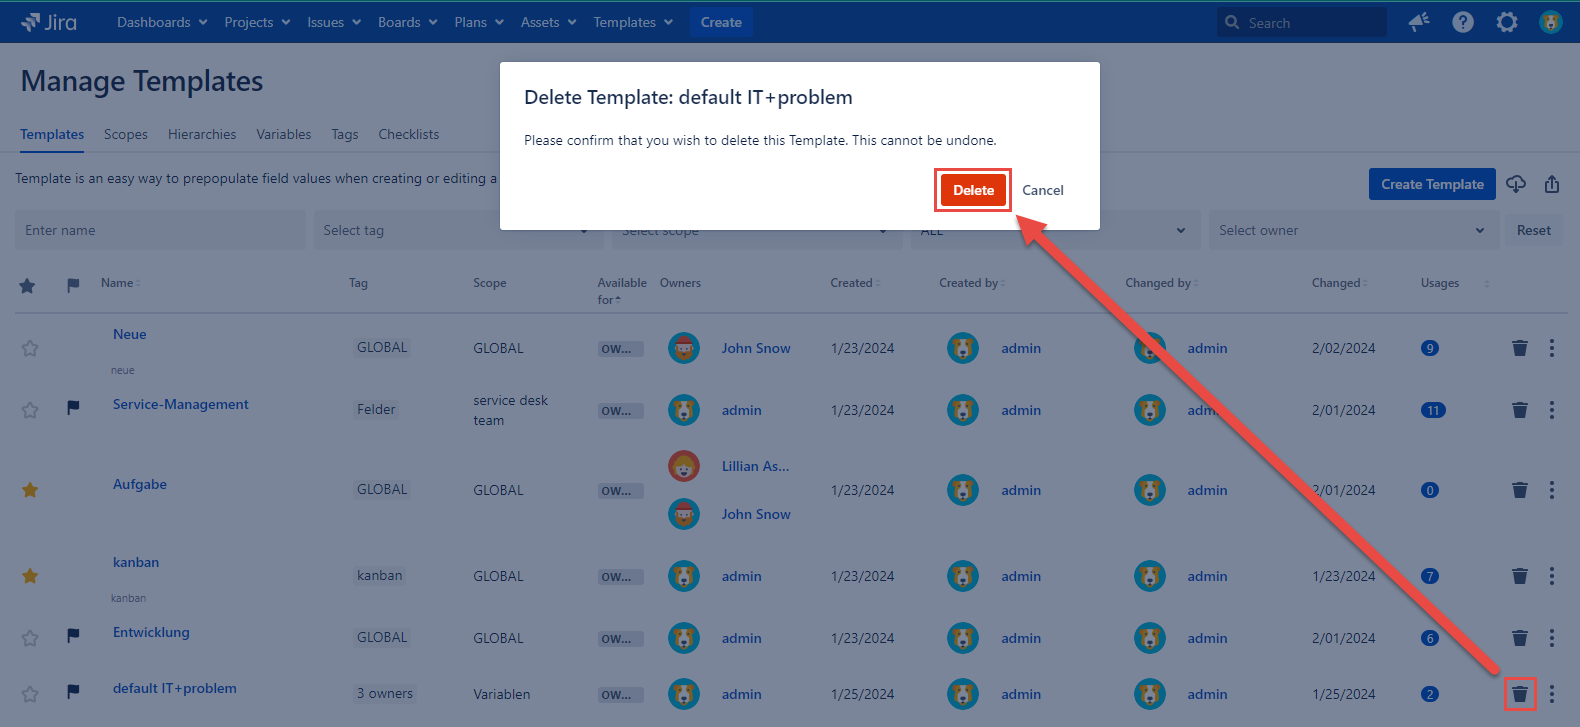
How to delete the Default Template?
To be able to delete the Default Template you are to be granted the Delete Template permission on the Smart Issue Templates Permissions page.
Open the Manage Templates page.
Click the trash bin image in the specific Template row the one you need to delete.
Click the Delete button in the Delete Template dialog.
For any questions or feature requests contact us via the Customer Portal
Or drop us an email at support@appsdelivered.atlassian.net. If you are using this option, please check your junk folder regularly, as our reply can be placed there by your email service.
Before submitting a bug report or support ticket, please update to the latest version of the add-on.
Please add information about the version of Jira and the add-on.