Apply the hierarchy containing the checklist
To have an access to the Checklists functionality the user has to be granted the ‘Manage Checklists’ permission on the ‘Smart Issue Templates Permissions' page
Once the checklist was created as it is described here Create, Edit, Delete, View the Checklist | Create-Checklist, it can be added to the hierarchy.
Open the ‘Manage Hierarchies’ page with the detailed view and select the specific hierarchy. Click the ‘Add Checklist’ button below the hierarchy name.
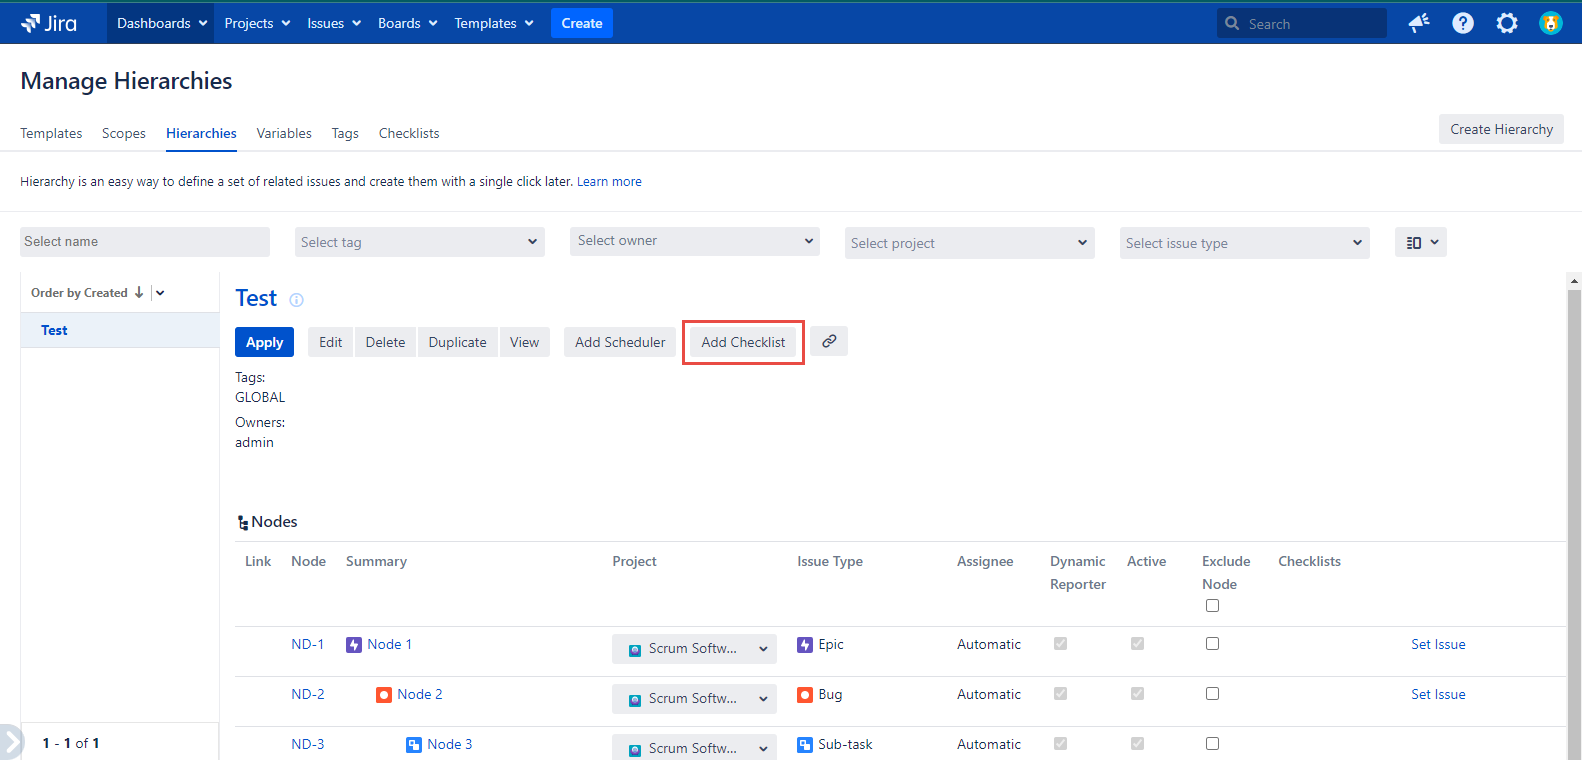
You’ll notice this dialog:
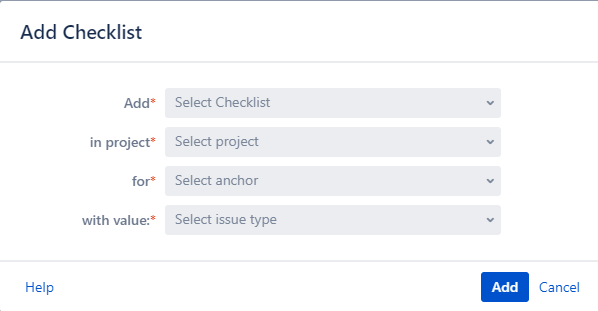
Field Name | Description |
|---|---|
Add | Select the Checklist you want to add to the following hierarchy (single select) |
In project | Select one project you want to add the Checklist for (single select) |
for | Select the anchor as the Issue Type |
with value | Select the specific issue type this Checklist will be added to (single select) |
All fields on the ‘Add Checklist’ dialog are mandatory.
Select the data in the fields and click the ‘Add’ button. You’ll see the Checklist name added to the selected issue type and displayed in the ‘Checklists’ column on the ‘Manage Hierarchies’ page. The checklists added to the specific nodes are also visible on the ‘Apply Hierarchy’ dialog and on the hierarchy view page.
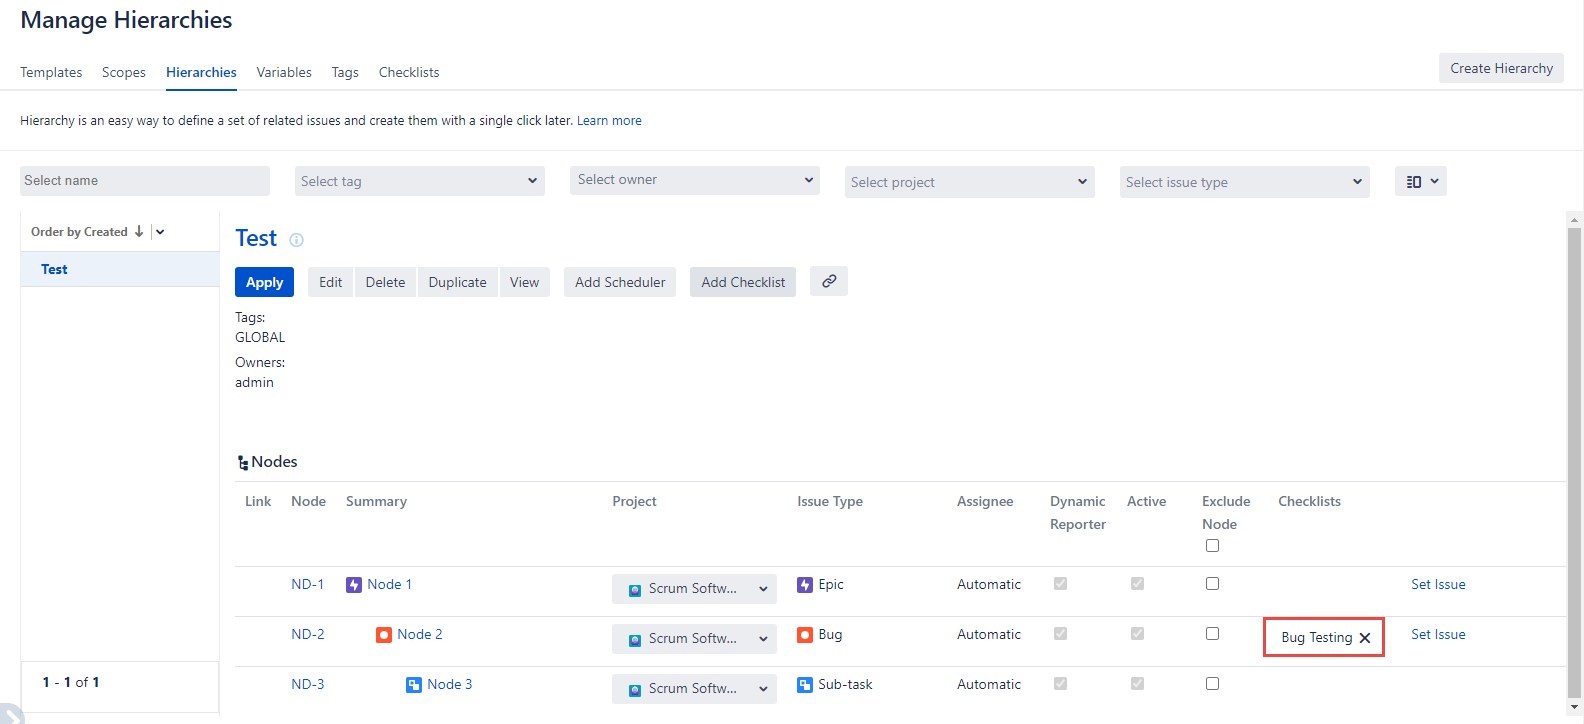
You can add several Checklists for the same hierarchy and for the same issue type.
As soon as the Checklist is added you can apply the hierarchy with the scheduler or with the ‘Apply’ button.
You’ll see the Checklist in the lower right corner of the issue view page.
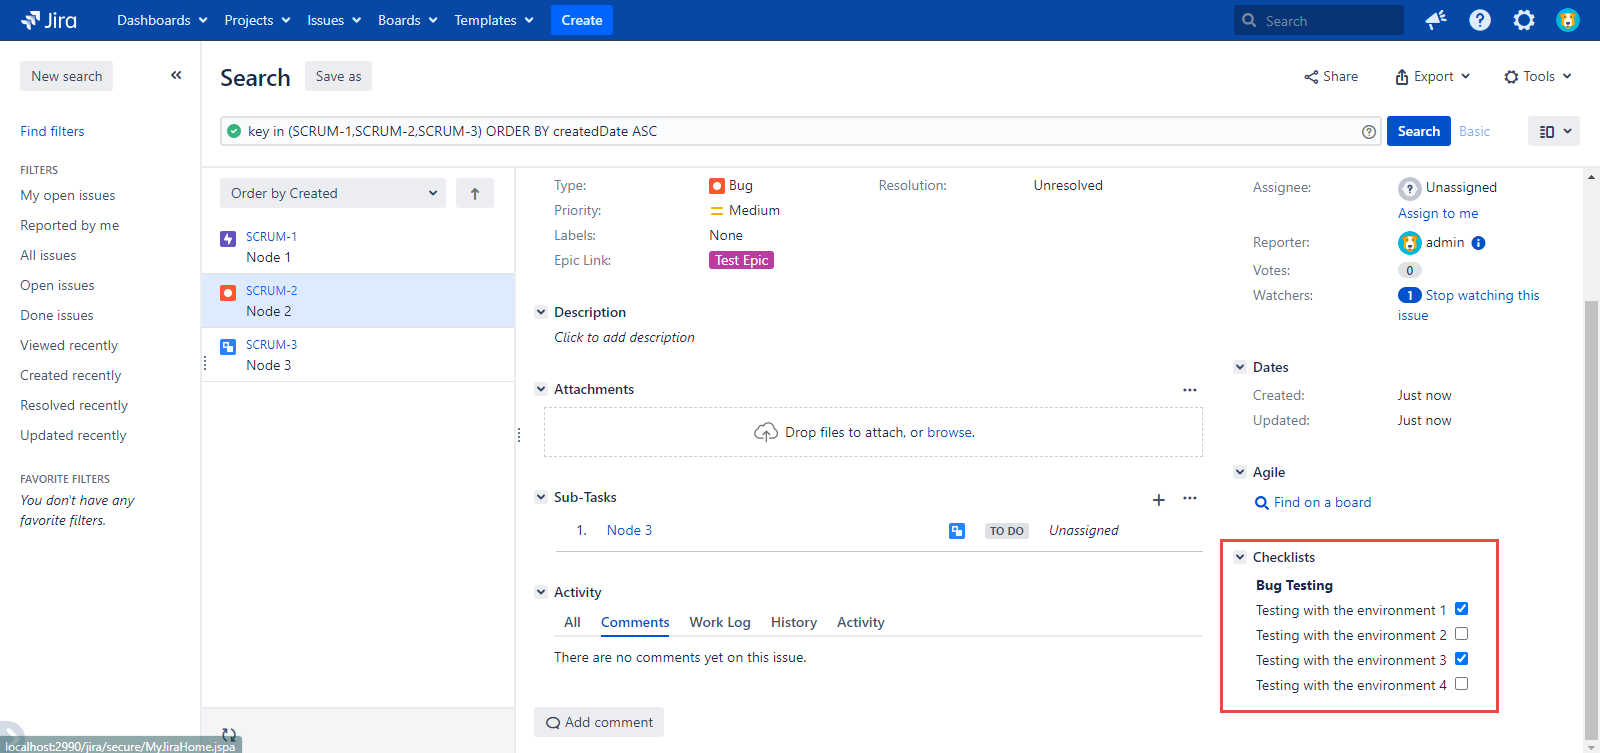
The options are available to be checked and unchecked there.
Scopes
After adding the checklist to the specific hierarchy, you can view this data using the 'Scopes' button.

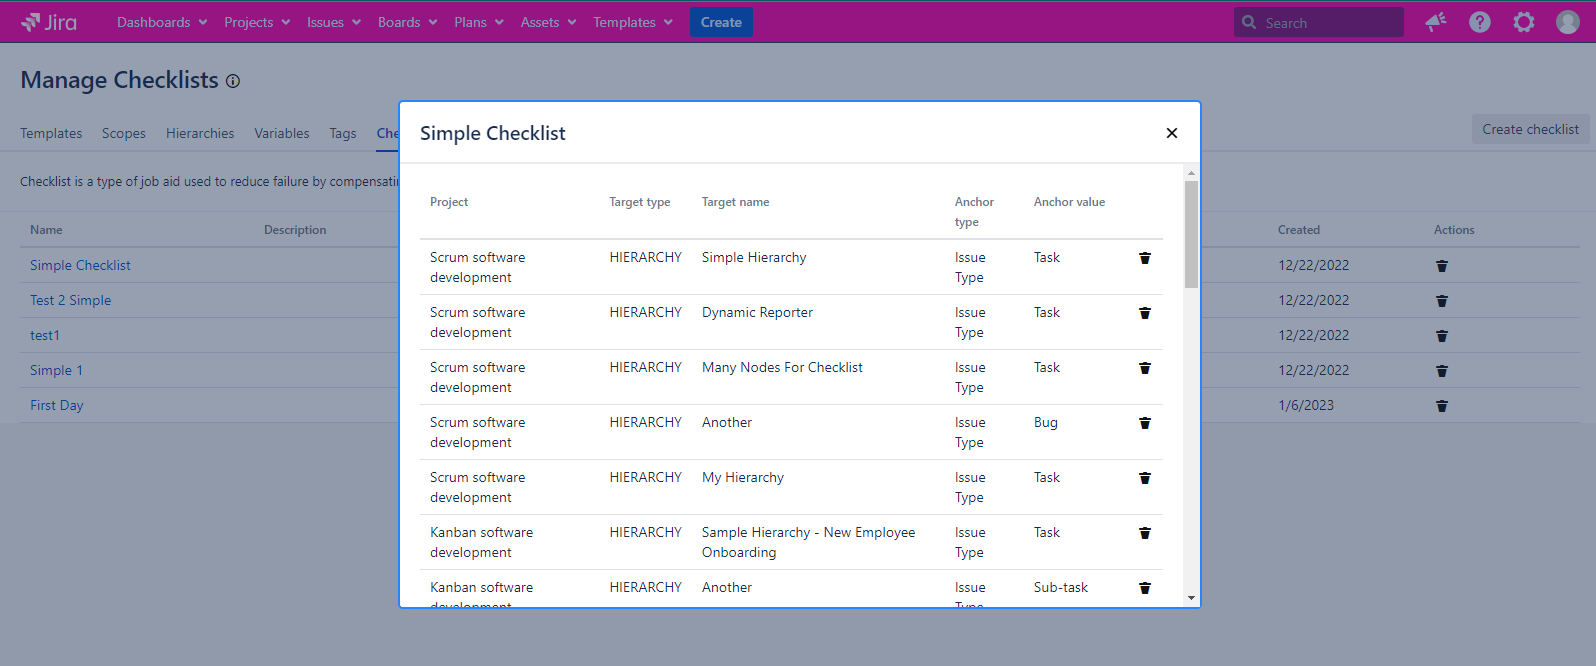
The data is placed on the following dialog:
Column Name | Description |
|---|---|
Project | Project name dealing with the current Checklist |
Target type | Shown only with hierarchy |
Target name | Hierarchy name containing the Checklist |
Anchor type | Only submitted with transaction type |
Anchor value | The issue type which this Checklist is added to |
For any questions or feature requests contact us via the Customer Portal
Or drop us an email at support@appsdelivered.atlassian.net. If you are using this option, please check your junk folder regularly, as our reply can be placed there by your email service.
Before submitting a bug report or support ticket, please update to the latest version of the add-on.
Please add information about the version of Jira and the add-on.
.png)